
How to Ride an Electric Scooter: From Beginner to Expert
Starting on your electric scooter journey is one heck of a rush.
With new scooters constantly pushing the boundaries of performance, the thrill of the ride is only getting more intense.
But with great power comes great responsibility. Knowing how to ride your scooter is imperative to keeping you and others safe.

Following years of experience, our founder, resident expert, and leading authority in the electric scooter industry, Josh Frisby, will teach you everything you need to know about the do’s and don'ts of riding an electric scooter, as well as some advanced techniques.
1. How to Launch the Scooter
Your scooter can either be launched by kicking off with one foot or from a standing position when in zero-start mode. Be careful on the throttle here.

2. Choosing a Riding Stance
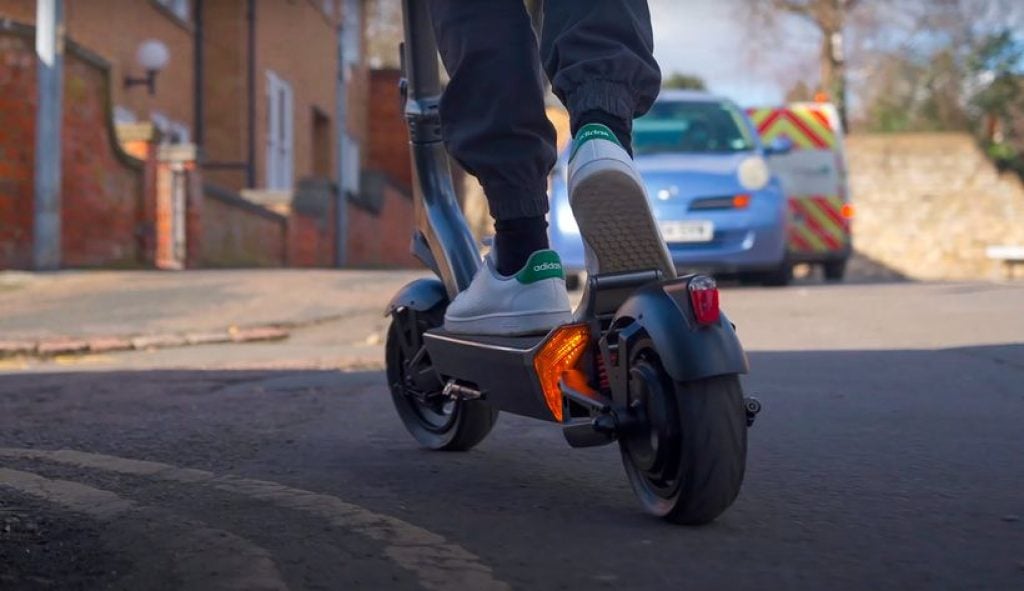
You’ll want to get your riding stance spot on at this point. I always recommend placing your weakest foot at the front of the deck and your strongest foot at the rear.
Either use an L (or upside-down T) shape for foot placement or if you plan on riding aggressively, you should rest your rear foot on the kickplate pointing it forward.
3. Using the Scooter Controls to Moderate Power
While in motion, you can switch between riding modes, select the number of motors in use (single or dual), and put the scooter into Eco or Turbo mode.
As a beginner, I recommend starting the scooter in the lowest setting (i.e. the slowest riding mode with just one motor). Once you gain confidence, you can gradually increase the starting power before graduating to a wheel-spinning start.
You should never change to a lower speed setting or from dual to single motor when riding at high speeds – doing so will send you somersaulting over the handlebars, as well as destroy the motors. Always slow down before reducing your scooter’s power.

4. How to Turn Safely
You’re going to need to turn at some point, and your speed will have a bearing on how you do so.
Turning at Slow Speeds
In circumstances where you are riding very slow (i.e. less than 7 mph), then you should rely on handlebar rotation to turn.
As your speed increases beyond 10 mph, the best way to turn is to lean towards the direction that you want to go with minimal handlebar rotation.
Turning at Fast Speeds
To turn while riding at fast speeds, you need to lean into the turn without rotating the handlebars – much like you would on a motorcycle.
Bonus Tip: Be Mindful to Not Over-Rotate Handlebars
If you want to avoid my mistake of jack-knifing the scooter, you need to resist any urge to over-rotate the handlebars. As a rule of thumb, the faster you go, the less you should rotate the handlebars.

5. How to Brake Safely
Your brakes are vitally important in ensuring you stay safe during a ride, so mastering their application is key.
Using the Correct Braking Technique to Maintain Chassis Control
When the time comes to slow down or stop completely, you should always apply the rear brake first, and then the front.
If you were to use the front brake first, the scooter would pitch forward, making it difficult to apply any other input (like steering) until the chassis regains equilibrium. The optimal technique is to apply the rear brake a fraction before you apply the front brake. Dabbing the rear first makes the back of the scooter squat, so when you apply the front the whole scooter will squat more evenly. As a result. the front won’t pitch forward as quickly and the scooter will feel more settled.
How to Shift Your Weight to Maintain Balance
An important aspect of braking safely is the effective use of your body weight. Shifting your weight down and over the rear wheel helps to maintain balance – especially during emergency stops – and increases braking power. This is because more weight is applied over the rear wheel which equates to more downward force and enhances traction.

How to Carve (+Best Tire Profile For Handling)
Carving is a technique that comes as second nature to all expert riders.
While rotating the handlebars may seem like the most natural way to turn, it will significantly reduce the speed and smoothness at which you can ride.
Instead, you need to lean into turns without rotating the handlebars. In other words, use your weight and gravity to point the scooter in the direction that you want to go.
Once you build up confidence, you can achieve a flow-state-like riding experience as you slalom your way through city streets.
It’s important to note, though, that not all tires are created equal when it comes to carving. Ideally, you’ll want tires with rounded front-on profiles as opposed to ones that are square. This is because the curvature of rounded tires can maintain traction even at acute angles. This is key to carving.
Square tires simply aren’t as effective. As you lean into corners, the tires roll onto their edges, meaning grip is lost causing them to slide out from under you.

How to Do an Endo
This technique is a classic and can be executed by bending your knees, applying the front brake, and keeping your body weight in the center of the scooter. Just don’t try doing this at speed.

How to Pop a Wheelie
No guide on advanced techniques would be complete without reference to wheelies, and again, this is reasonably simple to do with a bit of practice.
With your strongest foot planted on the kickplate, lean back as you hit the throttle to pull your front wheel up. Here, the key is to keep your weight firmly fixed at the rear to maintain a careful balancing act.

Customize Power Settings For Your Riding Environment
Having earned the status of an expert rider, you’ll want to explore your scooter’s power settings to deliver a riding experience that is primed for your environment.
The good news is that most performance scooters come with displays that have P-settings. These are pre-programmed settings that allow you to make simple adjustments like altering the top speed, as well as the strength of acceleration.
Some advanced electric scooters – like the NAMI Burn-e 2 – permit you to control the flow of power to each of its motors independently. As a result, if you like to set off with a wheel spin, you can funnel more power to the rear motor. Alternatively, if live in a hilly area, you could change the configuration of the motors to have more power running to the front motor to help pull you up hills as opposed to pushing you up using the rear motor.

Add Preload to the Suspension to Accommodate Your Weight
Riders come in all weights and sizes, so adjusting the suspension to suit your profile can elevate your riding experience significantly. The good news is that, on some scooters, you can add preload to the suspension.
For instance, say you have a scooter that supports 265 lbs of rider weight and you are nearing its weight limit. Here, you can add preload to prevent the springs from bottoming out. The more preload added, the greater the force needed to compress the springs.
Adding preload can be done by tightening the springs using a C-Spanner.

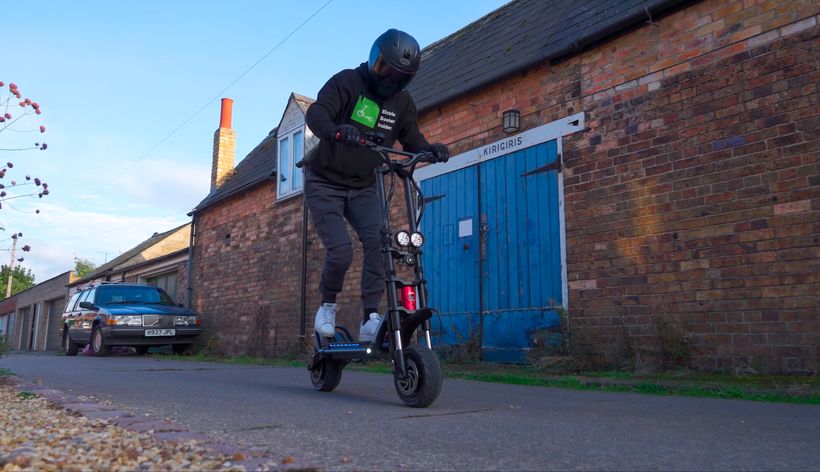
Not Wearing the Appropriate Safety Gear
First and foremost, never go for a ride without wearing the correct safety gear. As already stated, this means a full-face helmet, gloves, motorcycle jacket and trousers, and extra padding on the knees and elbows.

Riding One-Handed
Riding an electric scooter one-handed is an entirely different ball game from riding a bicycle on-handed.
Because the wheels on electric scooters are small, they are hard to control with just one hand, especially at speed. Ever seen a motorcycle lose control and wobble from side to side? The same happens on a scooter when the front wheel isn’t fully controlled.
Riding one-handed at speed is a recipe for disaster, so just don’t do it.

Over-Rotating the Handlebars
Turning the handlebars feels like a natural movement, but if you are riding above 10 mph, avoid rotating them overzealously.
Over-rotating can cause the front wheel to become locked perpendicular to the chassis and as a result, lead to jackknifing.

Pulling the Brakes Too Hard Without Shifting Body Weight
If you pull on the brakes too hard without shifting your body weight over the rear wheel, you will inevitably end up over the handlebars.

Using Your Rear Fender As the Main Brake
While some scooters come with stomp brakes (aka fender brakes), we do not recommend using them as the main source of braking because they can lock the rear tire and cause it to skid.
In some circumstances, the tire can get so hot that it melts and becomes misshapen – this is especially the case with solid rubber tires.

Riding on the Wrong Terrain
Always do your research when purchasing a scooter and stick to the terrain that it's made for.
Attempting to ride on terrain beyond your scooter’s remit is a recipe for failure. You’ll be surprised how the constant vibrations of off-road tracks can rattle the bolts, screws, and other components of street-grade scooters lose.

Not Abiding By the Regulations
Having a full and detailed understanding of the regulations that determine whether you can legally ride an electric scooter is vital.
Be sure to familiarize yourself with the following:
- Where you can ride (i.e. sidewalks and streets)
- Scooter requirements (i.e. maximum weight, maximum top speed, motor size, wheel diameter, front and rear lights, suitable brakes)
- Rider requirements (i.e. registrations, licenses, insurance, minimum age, helmet regulations)
For more info, read our guide to street-legal electric scooters.

Placing Feet Side-by-Side
Never, ever ride a scooter with your feet side-by-side. While this may appear to be a great way to balance your weight, it is, in fact, the worst.
Ultimately, riding in this stance reduces control over the chassis. Your strongest foot should always be behind your weaker one.

Incorrectly Distributing Your Weight
Whether you are accelerating, turning, braking, or just cruising, distributing your weight correctly plays a key role in your ability to control the scooter.
For reference, the best ways to shift your weight are as follows:
- Acceleration – Shift your weight forward and lean into (not on) the handlebars while adopting an aggressive riding stance.
- Turning – Shift your weight slightly forward and in the direction that you want to turn. For example, if you want to make a left turn, you should use gravity to your advantage and lean to the left.
- Braking – Shift your weight back and down over the rear wheel. This will maximize control and eliminate any risk of you going over the handlebars.
- Cruising – Shift your weight slightly forward and lean into (not on) the handlebars.

Helmets:
Purchasing a helmet should be the first box on your preparation checklist. As I’ve touched upon already, wearing one is an absolute non-negotiable. Don’t even think about placing a foot on an electric scooter unless you’re donning protection for your head. But what helmet should you opt for?
Full-Face Helmet (With Visor) – Recommended
Our recommendation would be a full-face helmet with a visor. These grant you complete protection above the neck.
A decent one – like the BELL Qualifier DLX MIPS – will be lightweight, padded, and breathable to ensure you can enjoy your ride in safety and comfort. The interior should also be fully removable and washable, while a padded wind collar will drastically reduce noise as you put the pedal to the metal.
One of the most important features of a helmet to look out for is MIPS. MIPS stands for Multi-directional Impact Protection and is a safety technology used in helmets for cycling, motorbikes, equestrian, and even construction.
The MIPS system is a low friction layer that allows for a sliding motion of 10 to 15 mm in all directions. This motion reduces the transfer of rotational motion onto your brain which can otherwise lead to concussion and serious traumatic brain injuries.

Full-Face Helmet (Without Visor)
Another option is a full-face helmet without a visor, though this leaves your face exposed and vulnerable in the event of a crash.
Consequently, we always recommend going with a helmet that comes with a visor.
You can, however, add goggles to this setup to give you more protection.
Regular bike helmet
Some people will tell you that a regular bike helmet is sufficient. I don’t recommend these, especially when you consider that some scooters can reach speeds beyond 30 mph.
While a bike helmet will shield your skull, your jaw, chin, cheekbones, and face will all be exposed in the event of an impact. Quite simply, your entire head and face should be protected.
Gloves:
Often, it's your hands that will bear the brunt of an impact. Injuring your hands is a serious matter that will affect everyday life, so you want to ensure they’re fully protected.
Full – Recommended
Full gloves will protect those precious digits as well as your palms. A good pair will come with palm sliders, which offer an extra layer of defense against broken wrists and snapped ligaments.
If – God forbid – you come off your scooter, a natural response is to reach out with your hands to break your fall, but if you are wearing gloves that don’t have scaphoid protection, the glove will likely grip the ground causing your forearm to rotate over your wrist causing hyper-extension.
On the other hand (no pun intended), if you have a pair of gloves with palm sliders, the small plastic sliders significantly reduce the risk of hyper-extension since they allow your hands to slide in the momentum of the fall.
Most full gloves will also come with padding around the knuckles, breathable fabric for ventilation, and even touch screen material on the thumb and index finger so you can control your phone without taking the gloves off.

Fingerless
You may think that fingerless gloves are comfier, cooler, and more convenient. None of these perceived pros outweigh the cons. Your fingers require as much protection as the rest of your hands, so don’t make the mistake of going fingerless.
Upper-Body Protection:
You’re whizzing along at 20 mph with a cool breeze rippling in the air. The temptation may be to wear minimal protection and enjoy that invigorating rush. We’re here to tell you that not wearing any upper-body protection is a risk not worth taking. So, what are the options?
Full Protection
The truth is anything can happen on an electric scooter, and your upper body is just as likely to suffer as any other part of you in the event of an accident. That’s why we suggest opting for full protection.
Motorcycle Jacket – Recommended
I always recommend wearing a motorcycle jacket as they come with elbow, shoulder, and back pads. They are also abrasion-resistant, meaning no road or gravel burn and more shielding for your skin.
In short, motorcycle jackets offer complete protection.

Body Armour
Though body armor provides considerable padding on your back, chest, shoulders, and elbows, it doesn’t offer the resistance to potentially skin-shredding skids. Stick to motorcycle jackets.
Body Part Protection
The alternative to wearing full upper-body protection is to purchase padding for your most at-risk body parts: wrists, elbows, and back. To put it simply, we wouldn’t recommend this on its own, though some options will serve as an added layer of protection.
Wrist Braces
Your wrists are constantly under duress when riding an electric scooter – whether you’re pulling on the brakes, steering, or revving the throttle. They’re also likely to suffer if you crash, so investing in some reinforcements could make all the difference.
Elbow Pads
Ever cracked an elbow? No? Keep it that way! We’d always recommend donning pads to ensure your ride doesn’t end in agony.
Most elbow pads also offer protection for the top half of your arm.
Back Pads
There’s no such thing as being too safe on an electric scooter that can hit the same speeds as a car or motorbike – and this is particularly true when it comes to your back.
As a rule of thumb, choose a back pad that is soft, supple, and comfortable to wear, but will harden and protect you on impact – like a D30 Back Protector. These types of pads disperse impact and minimize the energy transmitted to the spine.
Lower-Body Protection
Protecting your legs and hips from the full force of an impact is just as important as shielding your upper body – we depend on our lower body to get around, after all.
Full Protection
Your legs are likely to take a lot of punishment in the event of an accident, so shielding them is a must. So, what should you go for?
Motorcycle Trousers – Recommended
You’ve got the jacket – now it’s time to complete your look with motorcycle trousers.
They not only offer all-important knee and hip padding but a good pair will be abrasion-resistant thanks to a lining of kevlar.

Body Part Protection
As with your upper body, there’s also a range of options for protecting lower body parts.
Padded Shorts
Padded shorts will do a sterling job at protecting your hips, tailbone, and upper legs. The problem is that your knees and lower legs will be left woefully exposed. Skin tears, bruising, and broken bones are all left in the mix.
Hip Pads
Hips are often an afterthought but they are crucial to your mobility and are vulnerable to impact, so ensuring they’re protected by padding is an absolute necessity.
Knee Pads
Knee pads – we’ve all used them, whether that be riding your first bike or rollerskating. Similar to hip pads, we recommend wearing some, but the reality is you’re still leaving the rest of your legs exposed, and asphalt takes no prisoners. For more comprehensive protection you can pair knee pads with motorcycle trousers.
Start Modes
First, you want to familiarize yourself with your scooter’s start modes. There are two possibilities.
Kick-to-Start
Kick-to-start means you will be required to plant one foot firmly on the deck and push off with the other. Typically, you’ll need to hit 3 mph for the motor(s) to fire up.
Zero Start
Zero start, on the other hand, will enable your scooter’s motors to engage from a standing position. Here, caution is vital. Ensure your footing and riding stance is solid, and go easy on the throttle to avoid careening into an unforgiving tree.

Motor Power Controls
With your start mode figured out, next you’ll want to wrap your head around the scooter’s motor power controls.
Riding Modes
Each scooter has different riding modes, but the most common is a set of three. Each one summons higher speeds.
Familiarizing yourself with the differences in power will help you to stay firmly in control.
Dual & Single Motor Buttons
If you have a dual-motor electric scooter, it will come with single and dual motor buttons. Quite simply, these grant you the option of using one or both motors, which will determine the amount of power at your disposal.
As a rule, don’t ever switch to single-motor mode when riding fast because it will forcibly eject you off the scooter as well as destroy the motors. Instead, keep the scooter in dual-motor mode, slow down, and then when you are riding below 20 mph, you can safely switch to single-motor mode.
Eco & Turbo Buttons
Eco is used for conserving battery usage and limits your speed and motor capacity.
Turbo mode, on the other hand, lets the dog off the leash and allows you to hit top speeds.

Throttle Type
Different scooters use different throttles, and the responsiveness of your throttle may depend on its type.
Thumb
Many entry-level scooters will come with a thumb throttle as these are the most ergonomic and easy to use. They allow you to maintain a firm grip on the handlebars, while also enabling a smoother modulation of speed.
With thumb throttles offering the most ergonomic use, their popularity has risen in recent years and as a result, higher-performance scooters have begun to incorporate them into their design.
Finger
Finger throttles tend to be integrated into a display – like the QS-S4 or EY3 – and are found on performance scooters (i.e. those that reach 30 mph and beyond).
While these have, in the past, been the preferred throttle type for performance scooters, they have their drawbacks. Most notably, they can cause your hand to cramp since you have to adopt a claw-like grip to use them. Similarly, because their positioning in a scooter’s cockpit is in front of the right handgrip, they have been known to interfere with the ability to pull on the brake lever below them.
Twist
Twist throttles are the rarest of throttle breeds, but offer good all-round control.
Effectively bringing motorcycle capabilities to an electric scooter, they work as a movable part of the handgrip, allowing you to twist it with your full hand to maintain a firm hold. This can, though, inhibit your capacity to use the brakes when accelerating. Care should also be taken when grabbing hold of the scooter when stationary.

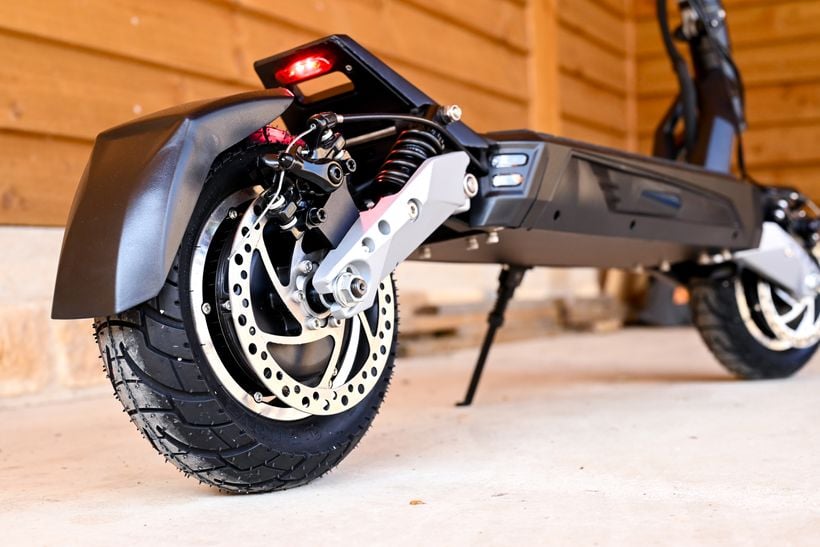
Brake Controls
As well as the throttle, the type of brakes depends on the scooter that you have and the power needed to slow it down. There are varying combinations of braking setups and familiarizing yourself with yours is crucial
Mechanical Brake Levers
Most electric scooters utilize mechanical brake levers, which are positioned on each side of the handlebars and function in the same way as brakes on a bicycle.
Hand-activated brakes are safer and more effective than the foot brakes you’ll find on scooters at the lower, entry-level end of the spectrum.
For context, the most common brakes that are controlled via levers on electric scooters are as follows:
- Cable-actuated discs
- Cable-actuated hydraulic discs
- Drums
Foot Brake
A foot brake takes the form of a rear fender that the rider pushes down on to immobilize the rear wheel. These perform poorly in wet weather and can create unsafe braking conditions as they become locked and skid.
Electronic Paddle
Electronic paddle brakes are generally reserved for lower-powered scooters that don’t require as much mechanical braking power.
In a scooter’s cockpit, the paddle will typically be found on the left and should be used as a backup while using the mechanical brakes.
Anti-Locking Brake System (ABS)
ABS works by sensing when the wheels are about to lock.
It rapidly reduces and increases the braking pressure multiple times per second, applying the optimum pressure. This allows the wheels to keep moving as the scooter slows down, instead of locking up.
It's important to be aware of whether your scooter comes with this braking mechanism because, when in action, you’ll feel a vibrating and shuddering effect.

Frame
Your scooter’s frame is its skeleton – any weaknesses, and you could be in for a world of pain. So, what do you need to check?
Ensure Handlebars & Controls Are Fixed in Place
First off, make sure everything is fixed firmly in place – pay particular attention to the handlebar controls as any looseness could cause an accident when riding at high speed.
Your brake levers, throttle, and other scooter controls should all be tightly fastened.
Secure the Folding Mechanism
The last thing you want is for the stem to wobble – or even give way – when you’re in full flow. Make sure any safety pins are in place and clamps are secured.

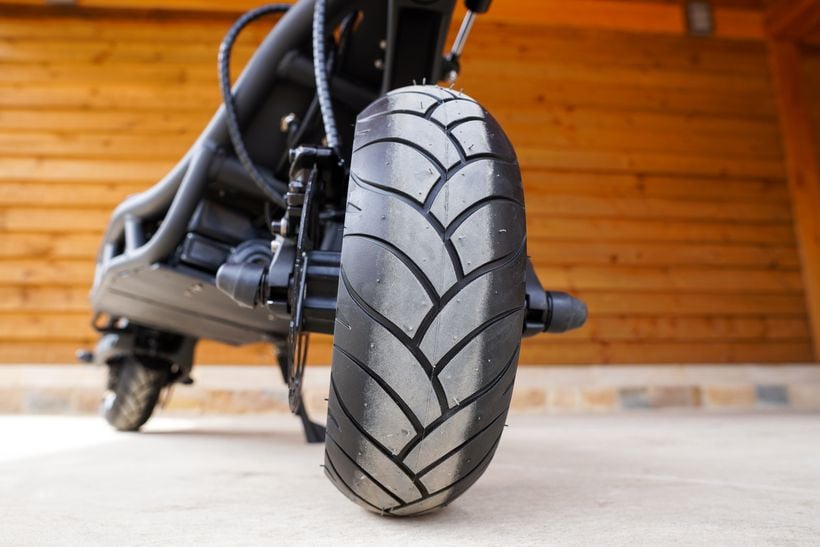
Tires
If your frame is its skeleton, then the tires are your scooter’s feet. You will therefore want to check that they are in full working order.
Ensure Tires Have Been Installed Correctly
Have they been mounted in the correct direction, as determined by the tread pattern? Getting this wrong can significantly impact your scooter’s handling and stability.
Directional tires will often exhibit an arrowhead-like tread pattern. This pattern determines the direction that they should be mounted. For instance, if you were to look straight on at a tire, the arrow shape should be pointing down to the ground.
Pump Tires Up to the Recommended Pressure
Ensure both tires are pumped up to the recommended pressure.
This will vary depending on the scooter, so always refer to the manual.
In general, the recommended pressure for electric scooter tires sits somewhere between 40 and 50 PSI.
Check the Condition of the Tire Tread
Checking the condition of the tire treads is a simple step to ensure your scooter is fit to ride.
If they’re too worn (i.e. the shape of the tire is malformed or it has chunks missing), this will inhibit your control since traction and grip will be compromised.
Brakes – Check They Work
You’ll want to check the brakes are working. Try and elevate your scooter so both wheels are off the ground, then pull on the throttle to get movement in the wheels, and test each brake independently.
Motors – Check They Work
As with the brakes, it’s best to elevate the scooter and test the motors. Revving the throttle while clicking through the different motor modes (single and dual) will reveal their working status.

Battery – Ensure the It Is Appropriately Charged
The final step is to check that your battery has enough juice in the tank. The last thing you want is to be unexpectedly stranded.


